Measuring Model Training with Weights & Biases on Saturn Cloud
Understanding how well models perform is a core component of the data science modeling process. A typical data scientist will go through countless models before choosing a final one when solving a business problem. Each model will likely have different parameters or features, and the models may perform better or worse on particular datasets or in different scenarios. If a data scientist can keep track of how all the different models performed versus each other, they’re unlikely to be able to find the best one for the scenario. This problem is far worse when using GPUs for model training or Dask clusters for distributed computing, as these are expensive and resource intensive. While Saturn Cloud makes it easy for a data scientist to use GPUs, Dask clusters, and other highly-valuable tools, Saturn Cloud doesn’t provide a mechanism for you to track your model performance–and that’s where Weights & Biases comes in.
Weights & Biases allows you to track everything you need to make your models reproducible, helps you efficiently manage your model and dataset pipelines – regardless of framework, environment, or workflow. It’s used by ML engineers at OpenAI, Lyft, Pfizer, Qualcomm, NVIDIA, Toyota, GitHub, and MILA. Weights & Biases easily connects with Saturn Cloud so you can train complex models with GPUs and Dask, and then compare results between different models. Weights & Biases is framework agnostic and is integrated into all of the popular ML frameworks such as Keras, Pytorch Lightning, Hugging Face, Yolov5, Spacy and more, see their docs for all available integrations.

Saturn Cloud and Weights & Biases work well together because they’re cloud resources that don’t require much setup. Compared to other methods of measuring expensive training models, Saturn Cloud and Weights & Biases both are cloud based solutions–simply create accounts with each tool and with a few lines of code you’re running. You don’t have to worry about installations or being stuck with the resource limitations of a particular machine. And your model results aren’t saved to a particular compute instance of Saturn Cloud–they’re stored in the cloud with your Weights & Biases account.
Weights & Biases also works with many different types of models, rather than being locked into a single framework such as TensorFlow. This means as you iterate through possible models on Saturn Cloud you don’t have to switch between measuring frameworks. Weights & Biases also measures details of the machine that is training the model, such as GPU usage and temperature. Knowing the GPU usage when you have a system such as a distributed Dask cluster of GPUs is really valuable for understanding why certain workers aren’t performing fully.
And ultimately, using Weights & Biases for model training on Saturn Cloud will save you an enormous amount of time compared to the more traditional solution of having your code output intermediate results to files (say a folder of JSON). By trying to build a solution yourself you will have to spend so much time figuring out where and how to consistently save the data across multiple runs and how to visualize it effectively.
With that all said, here is how you can easily get started with Weights & Biases on Saturn Cloud:
Starting with Weights & Biases on Saturn Cloud
For this example we are going to use Weights & Biases to monitor performance of a PyTorch model trained on a single GPU in Saturn Cloud. These same steps can work with lots of other scenarios–training a PyTorch model across multiple GPUs with Dask, using Dask to concurrently test different parameters for a TensorFlow model, or more! While this blog post only contains a sample of the code used, you can see the full code on GitHub.
1. Create accounts and connect them
First you’ll need to create free accounts on Saturn Cloud and Weights & Biases. The Saturn Cloud account gives you 10 hours of a Jupyter instance and 3 hours of a 3 Dask cluster per month. These hours include instances with GPUs! The Weights & Biases account lets you store unlimited experiments in a personal account and is completely free for academic users.
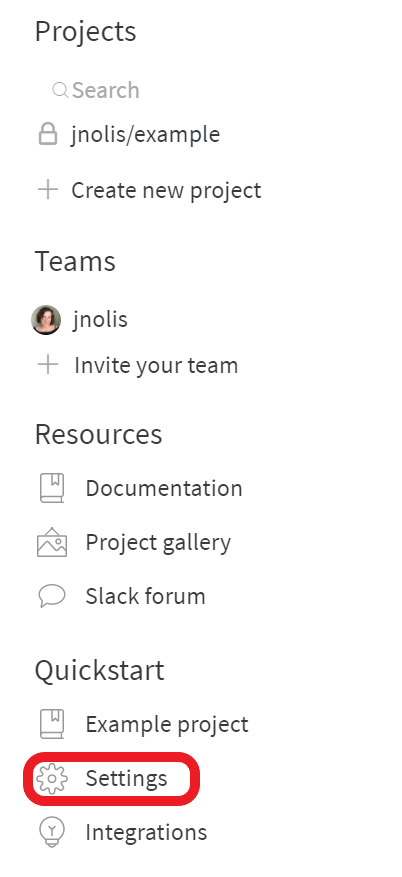
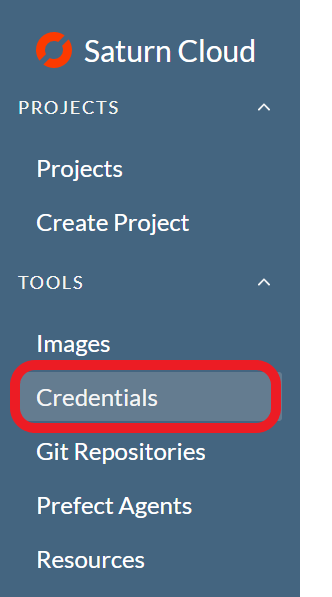
Once you’ve created your accounts, you’ll need to go to your Weights & Biases settings and get your API key. Take that and go to the Saturn Cloud credentials page and create a new credential called WANDB_LOGIN with the value as your API key from your Weights & Biases account


2. Create a Saturn Cloud project

Just like with anything on Saturn Cloud, the first step is to create a new project for you to work in. Create a custom one by clicking “create custom project”–in general you’ll want to select the specific project attributes you need for the work you’re doing (GPU/CPU, amount of RAM, etc). Here we are going to use a T4 GPU instance with the saturncloud/saturn-pytorch:2021.02.22 image. You also need to expand the “Advanced Settings” area and add the following to “Start Script” (this makes sure the libraries are installed and Weights & Biases is logged in when you start the project):
pip install wandb dask-pytorch-ddp torchvision fastprogress
wandb login --relogin $WANDB_LOGIN
After the project is created, start the Juptyer Workspace, and when it’s online connect to the JupyterLab.
3. Training the model
In this example we are going to train an image classifier with PyTorch and store the model performance with Weights & Biases. Rather than including all the code, we will highlight the important parts (but you can see the full code on GitHub). For more details on the different functions check out the Weights & Biases model tracking docs.
First, we log into Weights & Biases:
import wandb
wandb.login()
Here you can assign your model hyperparameters, as well as identifying where the training data is housed on S3. All these parameters, as well as some extra elements like Notes and Tags, are tracked by Weights & Biases for you.
Then we assign the model parameters and set the arguments for Weights & Biases (like model notes and tags). These will be passed to wandb
model_params = {'n_epochs': 6,
    'batch_size': 100,
    'base_lr': 0.01,
    'downsample_to': 0.5, # Value represents % of training data to use
    'bucket': "saturn-public-data",
    'prefix': "dogs/Images",
    'pretrained_classes':imagenetclasses}

wbargs = {**model_params,
    'classes':120,
    'Notes':"baseline",
    'Tags': ['single', 'gpu'],
    'dataset':"StanfordDogs",
    'architecture':"ResNet"}
We then use a single function to do the PyTorch training. Having a single function makes it easier to test different sets of parameters or to run different trials concurrently with Dask. At the end of the function we use the call wandb.log() to pass the measurements to Weights & Biases.
def simple_train_single(bucket, prefix, batch_size, downsample_to,
                        n_epochs, base_lr, pretrained_classes):
    # --------- Format params --------- #
    device = torch.device("cuda")
    net = models.resnet50(pretrained=True)
    model = net.to(device)
    # --------- Start wandb --------- #
    wandb.init(config=wbargs, project = 'wandb_saturn_demo')
    wandb.watch(model)
    # [prepare the model and data for training here (see GitHub for full code)]
    for epoch in range(n_epochs):
        for inputs, labels in train_loader:
            # [PyTorch training loop here (see GitHub for full code)]
            # ✍️ Log your metrics to wandb ✍️
            logs = {
                    'train/train_loss': loss.item(),
                    'train/learning_rate':scheduler.get_last_lr()[0],
                    'train/correct':correct,
                    'train/epoch': epoch + count/len(train_loader),
                    'train/count': count,
                }
            # ✍️  Occasionally some images to ensure the data looks okay ✍️
            if count % 25 == 0:
                logs['examples/example_images'] =
                    wandb.Image(inputs[:5], caption=f'Step: {count}')
            # ✍️ Log some predictions to wandb during final epoch for analysis✍️
            if epoch == max(range(n_epochs)) and count % 4 == 0:
                for i in range(len(labels)):
                    preds_table.add_data(wandb.Image(inputs[i]),
                                         labels[i], preds[i], perct[i])
            # ✍️  Log metrics to wandb ✍️
            wandb.log(logs)

    # ✍️  Upload your predictions table for analysis ✍️
    predictions_artifact = wandb.Artifact("train_predictions_" + str(wandb.run.id), type="train_predictions")
    predictions_artifact.add(preds_table, "train_predictions")
    wandb.run.log_artifact(predictions_artifact)

    # ✍️ Close your wandb run ✍️
    wandb.run.finish()
We then run the function on the set of parameters. You can now monitor the model run on Weights & Biases in real time from their website.
simple_train_single(**model_params)
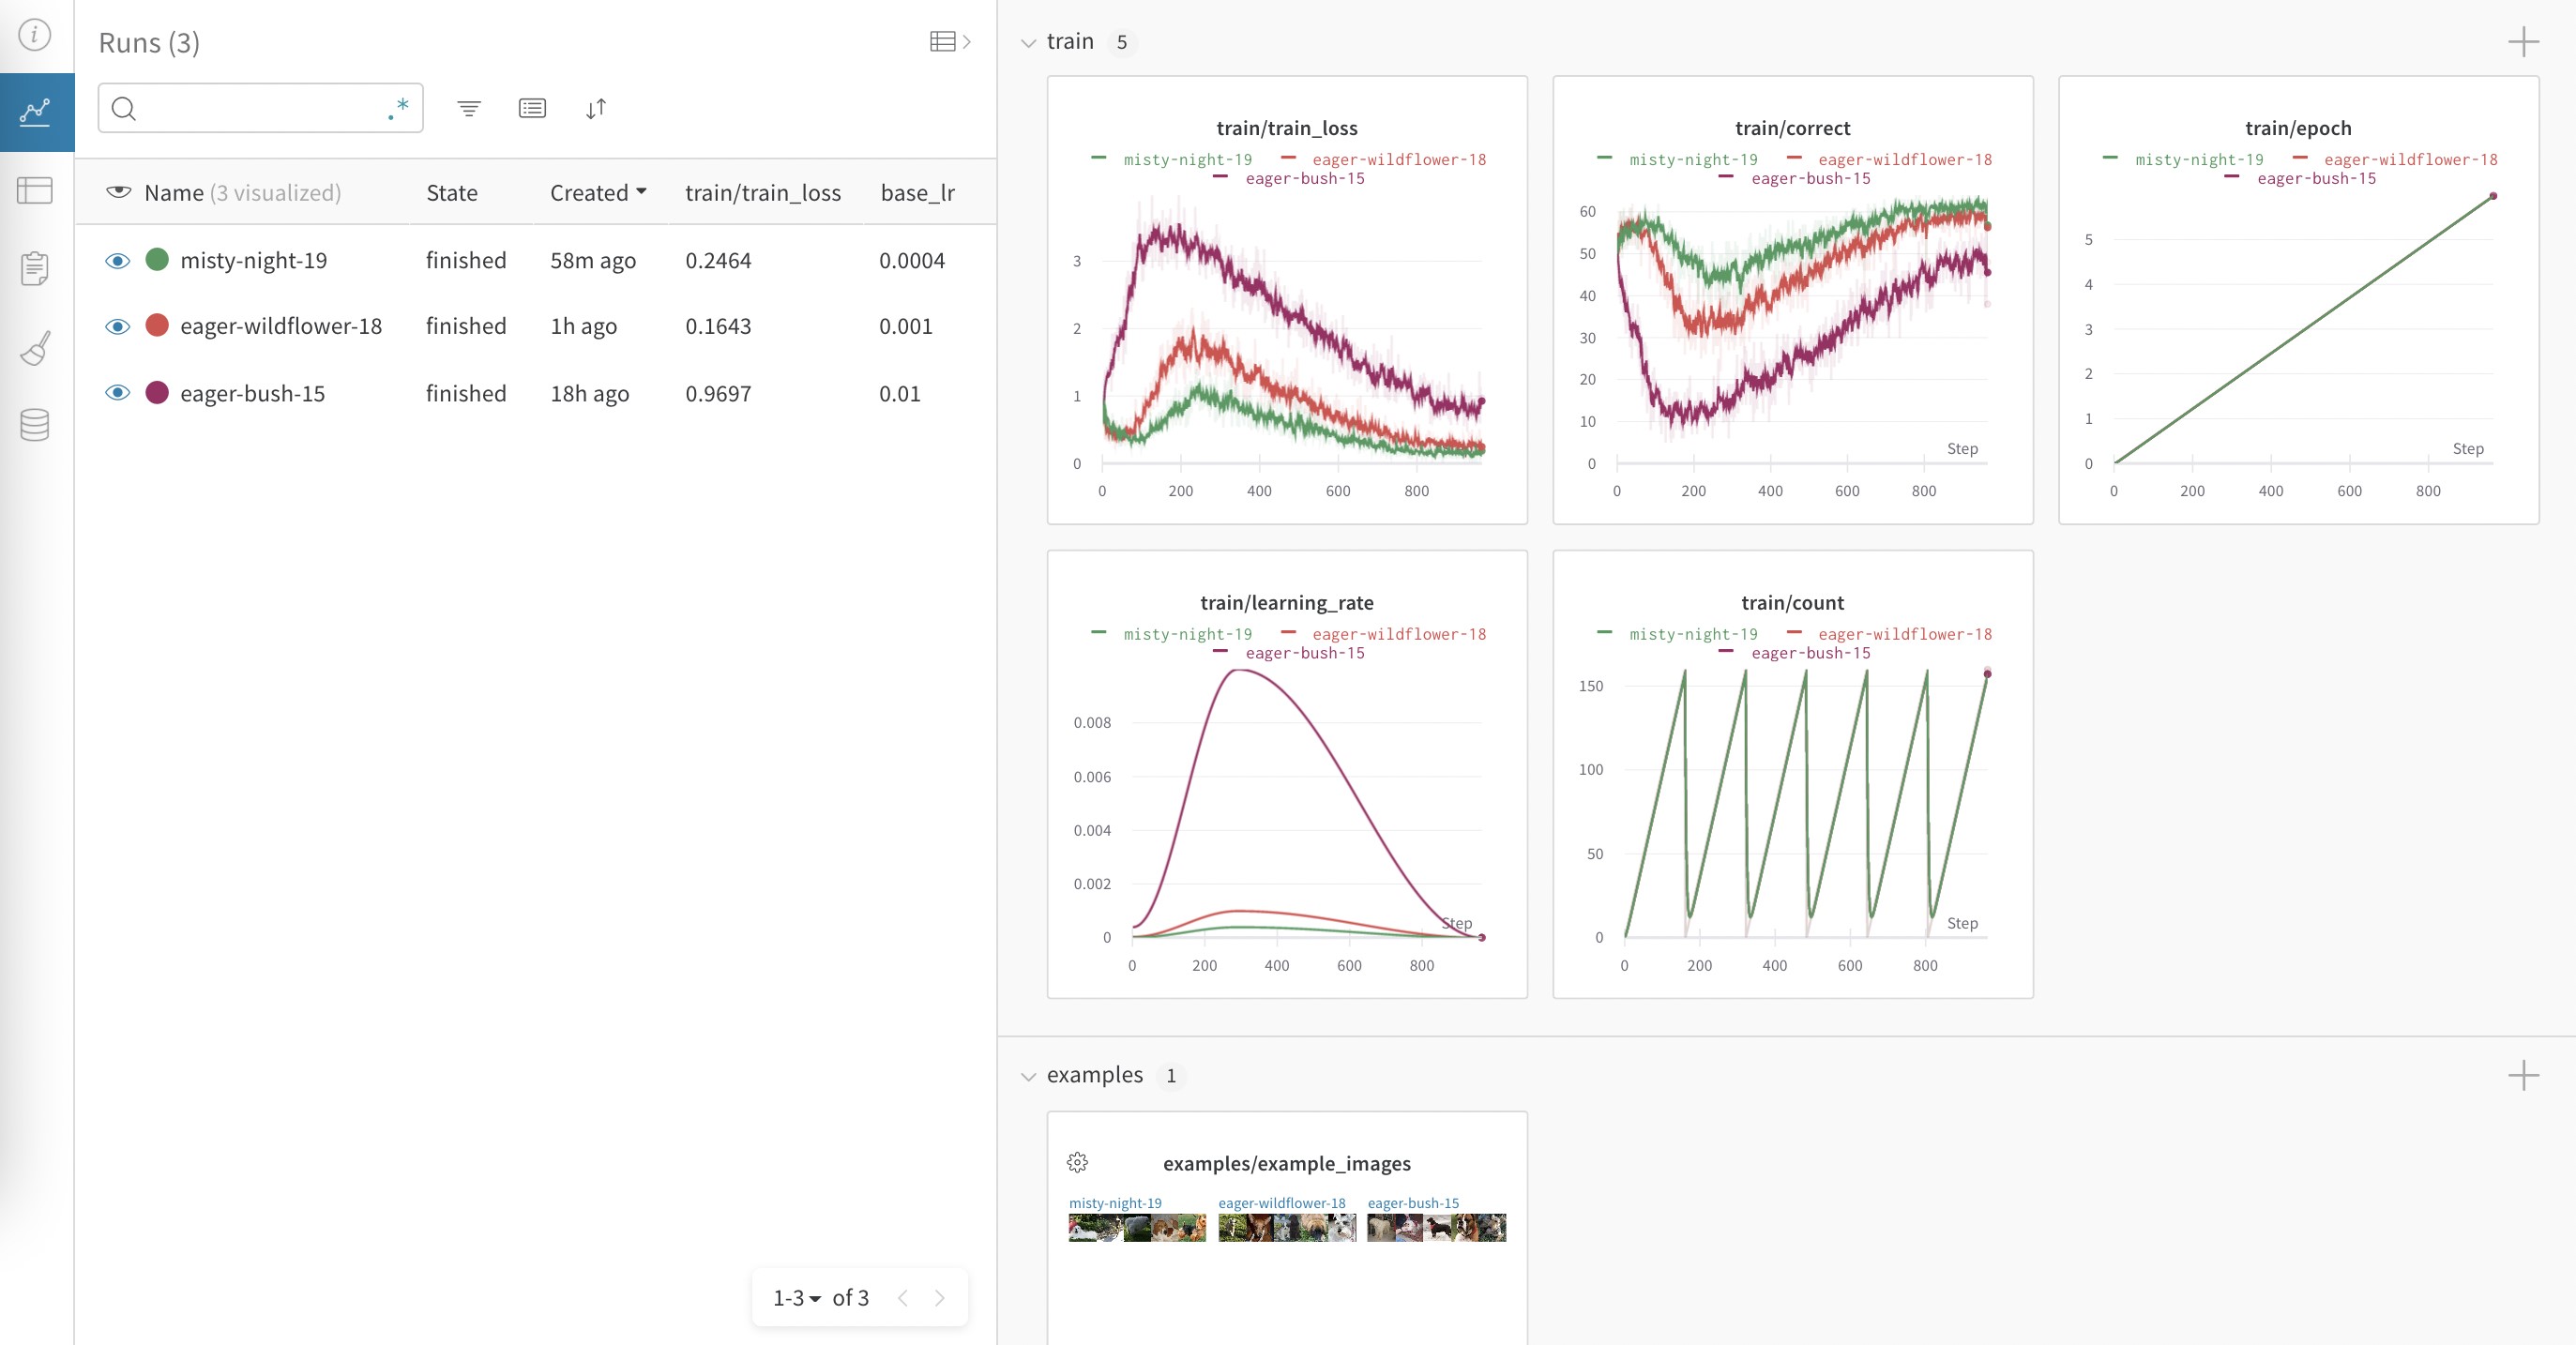
As the model trains you’ll be able to see the results in real time in the Weights & Biases app. You should see an in-progress dashboard that looks like the picture below. You can see the validation set loss decrease as the model improves over multiple epochs. You can also view this dashboard interactively on Weights & Biases.

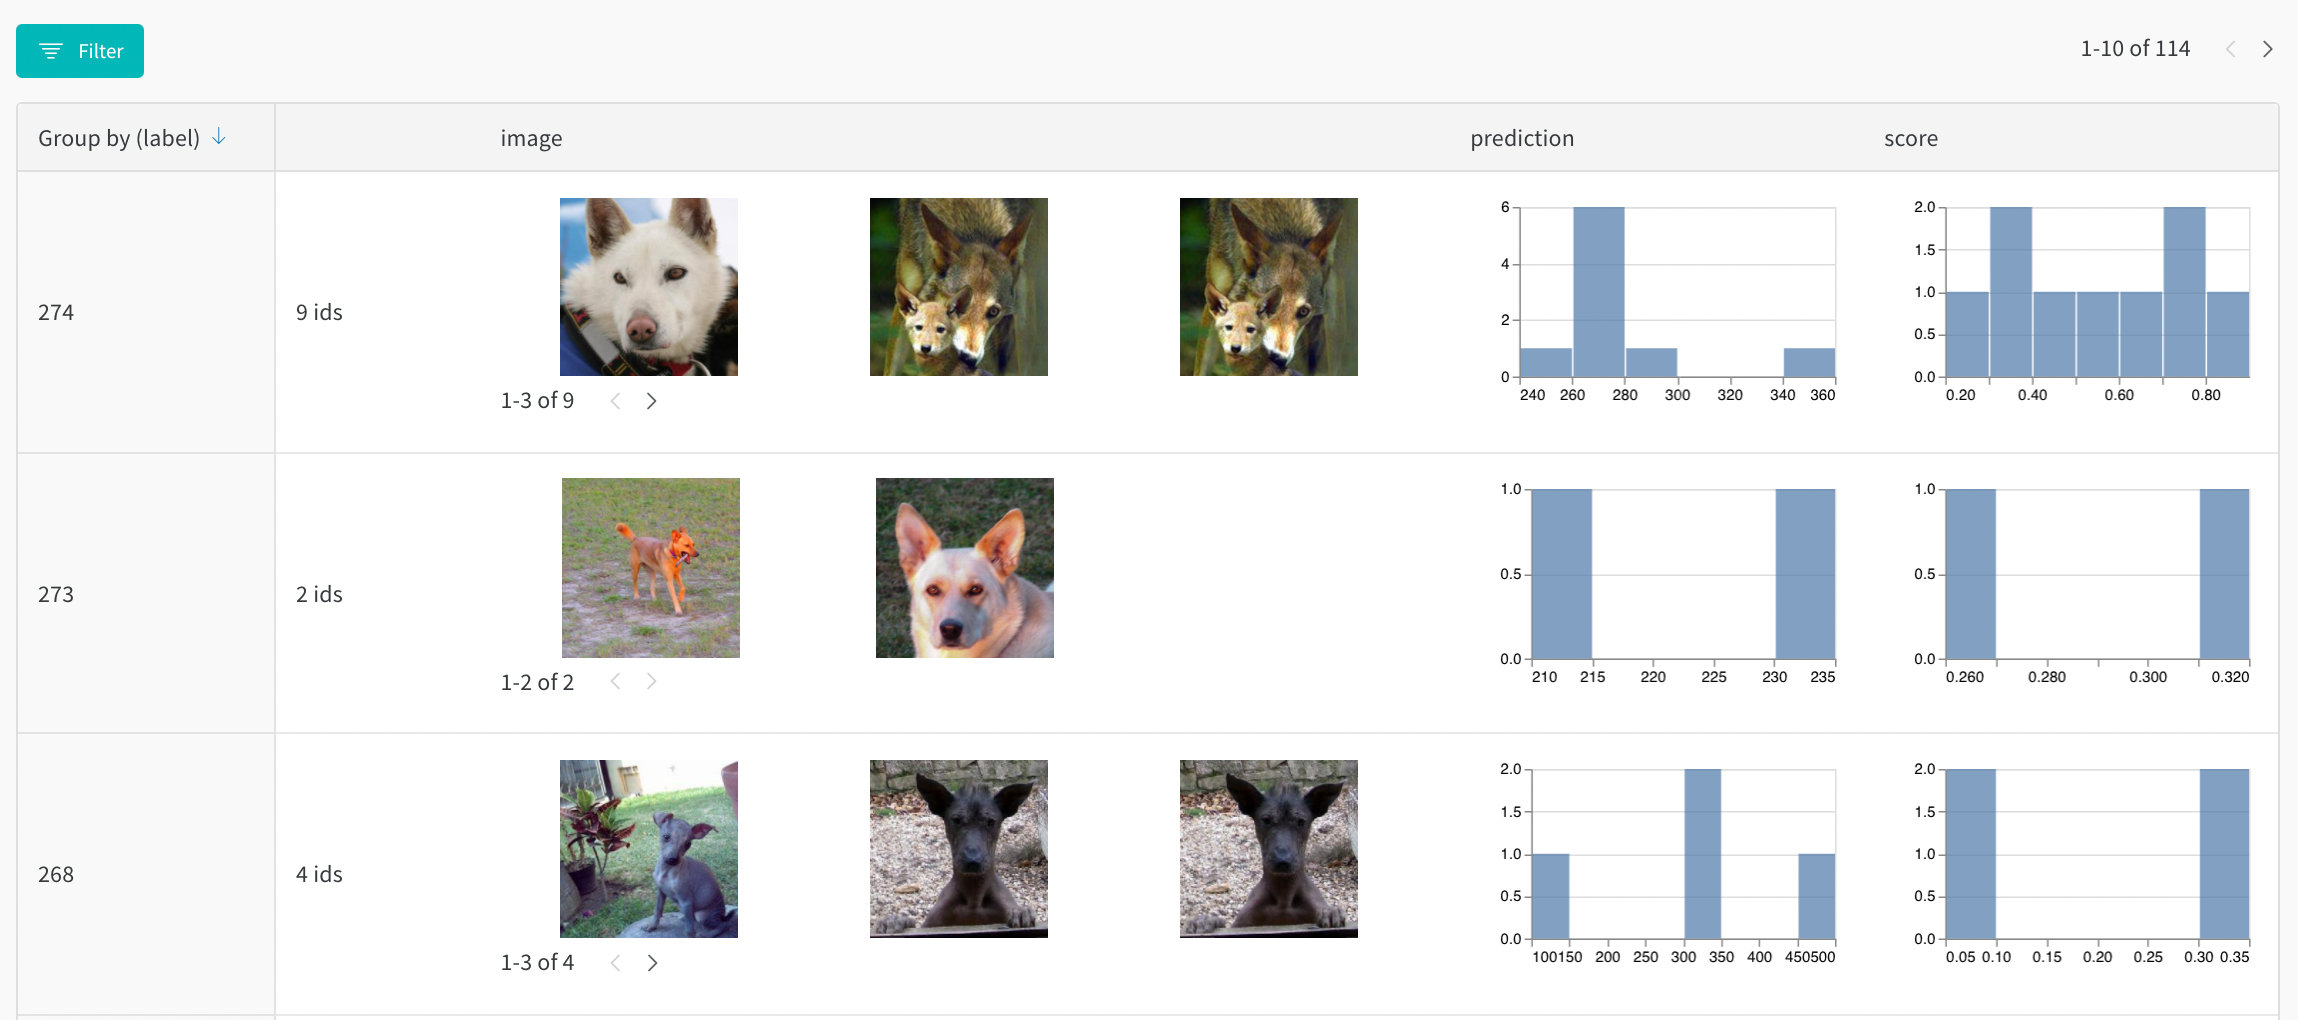
In addition, since we are keeping example images as part of our results we can also view those in Weights & Biases. By going to the “Artifacts” tab of the Weights & Biases project and selecting the table view, we can see dog images and how well the model did for them.

All together Weights & Biases makes it easy to understand how the model training is performing on Saturn Cloud.
With a little bit of credential setup and using the wandb.log() function within your training your models can be monitored and compared in real time. To start now with these tools sign up for Saturn Cloud Hosted Free and Weights & Biases today!
